Creating Stunning Ceramic Cat Art: A How-To
Create mesmerizing ceramic cat art by selecting the ideal clay for your vision. Craft intricate feline sculptures using hand-building or wheel-throwing techniques. Personalize your pieces with collars, toys, or intricate patterns. Perfect facial features to reveal your cat's unique personality. Master the firing and glazing process for a glossy finish. Paint with a color palette that speaks volumes. To take your skills to the next level, consider assembly, finishing touches, and display options. Unleash your creativity in every step of the process to truly bring your ceramic cat art to life. Embrace these techniques for purrfection.
Choosing the Right Clay
When selecting clay for your ceramic cat art, opt for a type that suits your desired level of detail and finish. There are various clay types available, each with its own characteristics. For intricate designs and fine details, porcelain clay is an excellent choice due to its smooth texture and ability to hold intricate features. If you prefer a more forgiving clay that's easier to work with, earthenware clay might be the best option. It's softer and more pliable, making it ideal for beginners or artists focusing on larger, more organic shapes.
Once you have chosen the clay type that aligns with your artistic vision, it's time to consider molding techniques. Hand-building is a popular method for crafting ceramic cat art, allowing you to create unique shapes by manipulating the clay with your hands. Pinching, coiling, and slab construction are common hand-building techniques that can be used to sculpt the body, head, and other features of your feline masterpiece. Additionally, wheel-throwing is another technique that can be employed if you prefer a more symmetrical and refined look for your ceramic cat sculpture.
Sculpting the Cat Figure
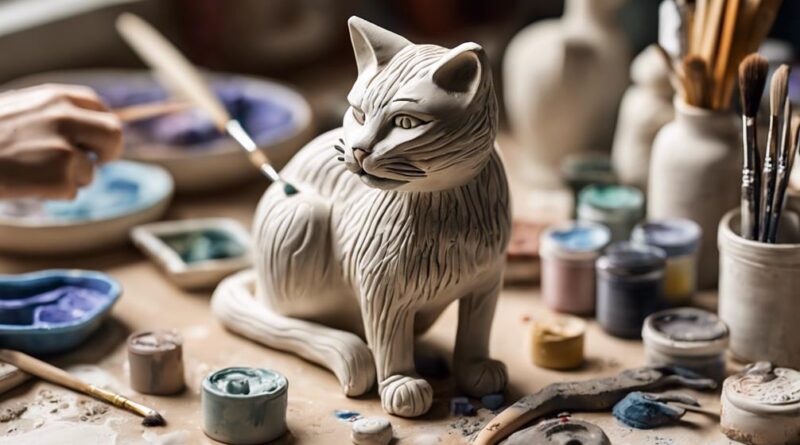
To bring your ceramic cat art to life, start sculpting the cat figure by focusing on defining the body shape and features with your chosen clay type and molding techniques. Select a clay that suits your sculpting needs, whether it's water-based clay for more flexibility or oil-based clay for intricate details. Begin by creating a basic shape that represents the cat's body, ensuring the proportions are accurate. Use sculpting tools to refine the shape, paying attention to the cat's anatomy and posture.
When sculpting the cat figure, keep in mind proportion perfection. Cats have unique body proportions, with elegant curves and subtle muscle definition. Use reference images or even observe a cat to capture the essence of feline anatomy. Sculpting tips include starting with a rough outline before adding details, working from large areas to smaller ones. This helps maintain balance and symmetry in your sculpture.
Experiment with texture techniques to add depth and realism to your ceramic cat. You can use tools to create fur-like textures or smooth surfaces for a sleek look. Play around with different techniques to find what works best for the style you want to achieve. Remember, materials selection plays a crucial role in the final outcome of your sculpture, so choose wisely to enhance the overall aesthetic of your ceramic cat art.
Adding Unique Details
For a touch of individuality, infuse your ceramic cat art with distinctive details that showcase your creative flair and personalize your sculpture. One way to elevate your ceramic cat art is by incorporating texture. Consider adding fur-like textures using tools like a needle tool or a comb tool to create a realistic and tactile surface. Experiment with different pressures and strokes to achieve varying textures that bring your cat sculpture to life.
Exploring color variations can also add depth and character to your ceramic cat art. Think about the coat colors and patterns you want your cat to have. Play with different glazes, underglazes, or oxides to create unique color combinations that reflect the personality of your feline sculpture. Don't be afraid to mix colors or layer them to achieve a more dynamic look.
Furthermore, you can enhance the details by adding small elements like a collar, a playful toy, or intricate patterns on the cat's body. These finer touches can make your ceramic cat art truly one-of-a-kind. Remember that the devil is in the details, so take your time to perfect each element. By incorporating texture and exploring color variations, you can create a ceramic cat art piece that stands out and captures the essence of your artistic vision.
Carving Facial Features
Capture the essence of your ceramic cat's personality by skillfully carving intricate facial features that bring your creation to life. When refining your carving technique, remember that attention to detail is key. Begin by outlining the eyes, focusing on their shape and size to convey different emotions. A slightly raised brow can give your cat a curious look, while a gentle slope may evoke a sense of calmness. Enhancing the expression through the eyes is crucial in portraying the desired mood.
Moving on to the nose, consider the angle at which it sits on the cat's face. A slightly tilted nose can add a playful or mischievous element to your creation. Pay close attention to the nostrils as well; small details like these can make a significant impact on the overall expression of your ceramic cat.
When sculpting the mouth, keep in mind that the curve of the lips can convey emotions such as joy, surprise, or even contentment. Experiment with different shapes and sizes until you find the perfect expression that resonates with you. Remember, the mouth is where the personality of your ceramic cat truly shines through, so take your time refining this feature.
Firing and Glazing Process
As you progress from carving intricate facial features on your ceramic cat, the next step involves embarking on the firing and glazing process to bring your creation to its final polished form. Firing techniques play a crucial role in transforming your cat sculpture into a durable piece of art. Before firing, ensure your piece is completely dry to prevent cracks. Slowly increase the kiln temperature to around 1940°F (1050°C) to bisque fire the clay, removing any remaining moisture and making it sturdy for glazing.
Once bisque fired, it's time to add color and shine with glazing. Glazing tips can elevate your ceramic cat to the next level. Choose glazes that complement your cat's features and personality. Apply the glaze evenly using a brush or dipping method, ensuring full coverage for a consistent finish. Experiment with different glaze combinations to achieve unique effects like shimmering metallics or vibrant colors.
Consider the firing temperature needed for the glazes you've chosen, and carefully load your cat into the kiln for the final firing. This firing will fuse the glazes to the clay, creating a glossy, protective finish. After cooling, admire your stunning ceramic cat art, now complete with intricate details, vibrant colors, and a professional finish that will captivate any viewer.
Painting and Decorating
Explore various painting techniques to bring out the personality and charm of your ceramic cat art. The color palette you choose plays a significant role in conveying different moods and expressions. Consider using warm tones like oranges and yellows for a friendly and playful vibe, or cooler tones like blues and purples for a more serene feel. Experiment with different brush techniques to add depth and texture to your cat's fur, whiskers, and eyes. Thin brushes can help create intricate details, while broader brushes are great for blending colors smoothly.
When it comes to inspiration, look at real cats, illustrations, or photographs to guide your creative expression. Pay attention to the unique patterns, colors, and expressions of cats to infuse your ceramic art with authenticity and character. Don't be afraid to add your personal touch and let your imagination run wild.
Remember that the painting process is where your ceramic cat truly comes to life. Take your time, enjoy the process, and let your creativity flow. Each stroke of the brush is a chance to capture the spirit of your cat art. Embrace the joy of painting and decorating as you bring your ceramic cat to life with your chosen color palette and brush techniques.
Assembling the Art Piece
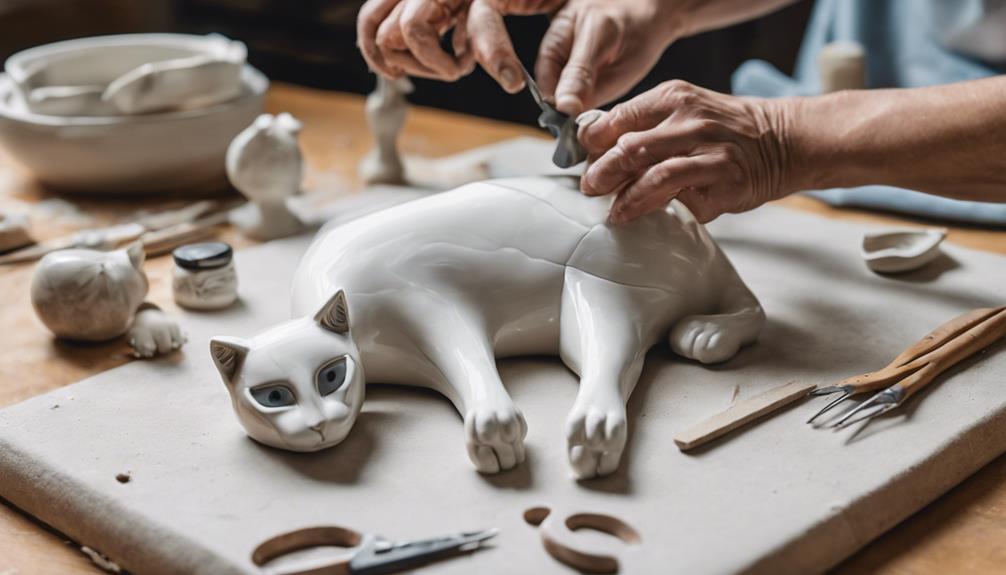
To bring your ceramic cat art to life, the next step involves carefully assembling the various components of the art piece. Here's how to do it:
- Clay Selection: Choose a clay type that suits the specific needs of your ceramic cat art. Different clays have varying properties, such as color, texture, and firing temperature. Ensure the clay is well-suited for sculpting intricate cat features and can withstand the firing process without losing its shape or details.
- Firing Technique: Proper firing is crucial for the structural integrity and aesthetic appeal of your ceramic cat. Follow a firing schedule that matches the requirements of the clay you've chosen. Be mindful of the temperature and duration to achieve the desired strength and finish for your art piece. Consider any glazing or additional firing steps necessary to enhance the overall look of your ceramic cat.
- Assembly Tips and Finishing Touches: Assemble the fired pieces of your ceramic cat art with care, using appropriate adhesives or techniques to ensure a sturdy bond. Pay attention to details like alignment and symmetry to create a cohesive and visually appealing final product. Add finishing touches such as painting small details, like eyes or whiskers, to bring your ceramic cat art to life. Consider incorporating unique elements like collars or toys to personalize your creation further.
Showcasing Your Masterpiece
Now, let's unveil the best way to present your ceramic cat art masterpiece for all to admire and appreciate. When it comes to showcasing your creation, there are various display options and presentation techniques you can utilize to make your artwork stand out. Consider placing your ceramic cat art on a sleek wooden shelf to give it a sophisticated look or opt for a minimalist approach by displaying it on a white pedestal to draw attention to the details of your piece.
To capture the essence of your ceramic cat art and attract potential buyers, mastering photography tips is essential. Make sure to use natural lighting to highlight the textures and colors of your artwork. Experiment with different angles and perspectives to showcase the unique features of your ceramic cat sculpture. High-quality images can also be used in marketing strategies such as creating an online portfolio or promoting your art on social media platforms.
When marketing your ceramic cat art, emphasize the craftsmanship and creativity that went into making each piece. Highlight the inspiration behind your artwork and share behind-the-scenes glimpses of your creative process to engage your audience. Collaborate with local galleries or participate in art fairs to reach a wider audience and gain recognition for your stunning ceramic cat art.
Frequently Asked Questions
Can I Use Regular Household Clay for Ceramic Cat Art?
Yes, you can use regular household clay for ceramic cat art. However, keep in mind that different clay types offer varying textures and finishes, influencing your sculpting techniques.
Ensure proper sculpture care by letting your piece dry slowly and thoroughly before firing. When painting, explore techniques like underglazing and glazing for vibrant colors and durable finishes.
Experiment with different methods to bring your ceramic cat art to life!
How Do I Prevent My Clay Sculpture From Cracking?
To keep your clay sculpture from cracking, make sure to maintain proper moisture levels throughout the sculpting process.
Ensure even thickness in your sculpture to prevent weak spots that may lead to cracking.
Is It Possible to Add Real Fur to My Ceramic Cat Art?
Yes, it's possible to add real fur to your ceramic cat art for a unique and lifelike touch.
Experiment with different textures by carefully attaching the fur to your sculpture. This can elevate your artwork and provide a tactile element that enhances the overall aesthetic.
Just ensure the fur is securely attached and consider how it complements the ceramic medium for a stunning final result.
Can I Use a Hairdryer to Speed up the Drying Process?
Yes, you can use a hairdryer to speed up the drying process of your ceramic cat art. It's one of the alternative methods to air drying. However, be cautious of potential risks like overheating. Keep the hairdryer at a safe distance and on a low setting to prevent damage or cracking.
Rotate the piece to ensure even drying.
Do I Need Special Ventilation for Firing Ceramic Pieces?
You should definitely consider the ventilation requirements for firing ceramic pieces. Ensuring proper airflow is crucial for safety and the quality of your work.
Always place your kiln in a well-ventilated area to prevent harmful fumes from accumulating. Safety precautions like installing a venting system or firing your ceramics outdoors can help protect your health and the environment.
Prioritize ventilation to create a safe and productive ceramics workspace.
Conclusion
Now that you have followed these steps to create your stunning ceramic cat art, it's time to showcase your masterpiece to the world.
Display it on a shelf, gift it to a fellow cat lover, or even sell it at a local art market. Let your creativity shine through in every detail of your unique cat sculpture, and watch as others admire your talent and hard work.
Congratulations on creating a work of art that truly stands out!